A warm hello, night-watchers and garden nerds! If you’ve ever wandered out at dusk with a flashlight and felt mysteriously delighted to find fuzzy, fluttering visitors sipping on your flowers, you’re in the right place. This guide will help you recognize who’s who in your backyard after dark, encourage more moth pollinators to visit, and give practical remedies to support them — all while keeping things friendly and slightly fun.
## Moth Identification For Backyard Garden Pollinators
Moth identification can feel like learning a new language: subtle wing marks instead of bright logos, nocturnal habits instead of daytime drama. But once you know a few families and behaviors, you’ll start spotting patterns. Start by noting size, wing shape, resting posture, antennae type (feathery vs. threadlike), and time of activity. Photographing at dusk or using a soft red light helps capture details without scaring them off.
### How To Observe Moths Without Disturbing Them
Be respectful: moths are delicate and easily injured. Approach slowly, avoid sudden bright white lights, and don’t touch their wings — scales rub off and they can’t fly well afterward.
– Use a dim red or green flashlight; moths are less sensitive to these wavelengths.
– Photograph from a few feet away and use a zoom to capture details like wing spots or fringe.
– Note the plant the moth was on — host associations are a huge help in identification.
### Basic Visual Clues For Quick Moth Identification
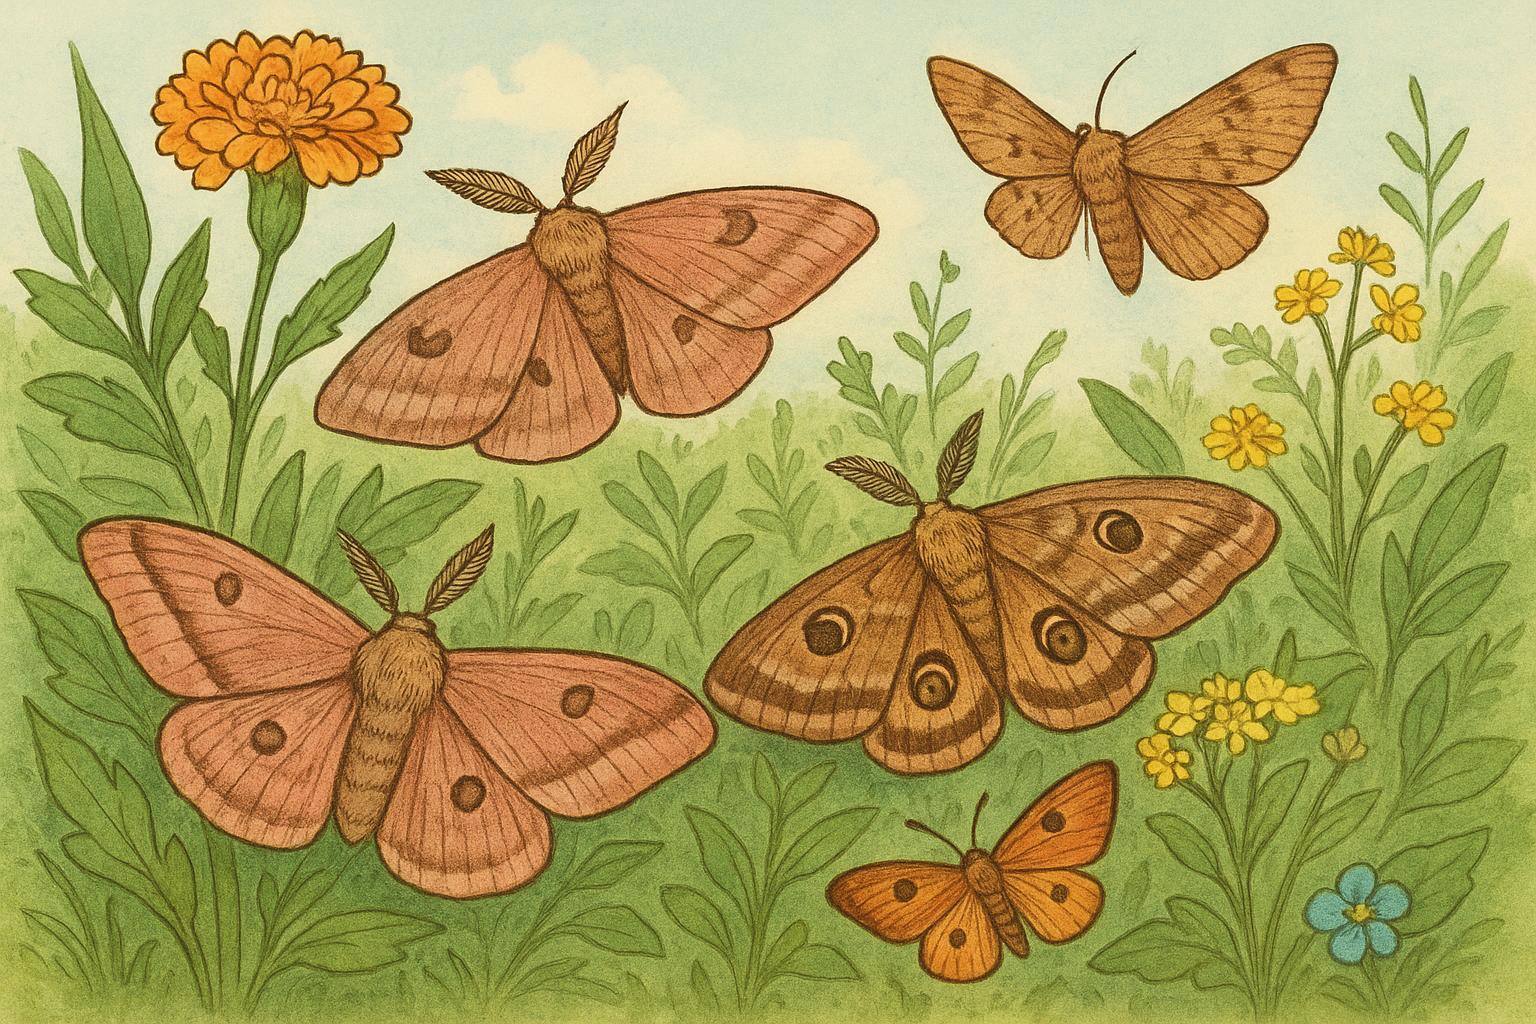
If you only remember one thing, let it be this: wing shape and resting posture give big clues. Many sphinx or hawk moths have long, narrow wings and a stout body; they often hover like hummingbirds. Geometer moths (inchworm relatives) rest with wings flat and often have delicate, scalloped edges. Noctuids and owlet moths are a very large, diverse group, often brown or gray, and those small dots and lines on their forewings are diagnostic.
#### Antennae: Telling Males From Females
Males of many species have comb-like (pectinate) antennae to sniff out pheromones; females usually have thinner, threadlike antennae. If you see a fluffy, feathery antenna, you’re likely looking at a male.
#### Wing Patterns And Coloration
Look for striking marks: eye spots, scalloped margins, and contrasting bands. Bright whites and pinks are rarer at night, so when you see them, it’s usually a species worth photographing and recording.
### Common Backyard Moth Families To Know
– Sphingidae (Hawk Or Sphinx Moths): Fast fliers, often large, some hover to feed.
– Geometridae (Geometers): Slender bodies, wings held flat; caterpillars are inchworms.
– Noctuidae (Owlet Moths): Huge family, many nighttime pollinators; often drab but varied.
– Erebidae (Tussock Moths, Tiger Moths): Some colorful; includes day- and night-flying species.
### Recording Your Sightings For Better Moth Identification
Keep a simple log: date, time, weather, plant association, and photos. Uploading to citizen science platforms helps experts confirm your IDs and improves knowledge about local pollinators.
## 2 Remedies To Attract And Support Moth Pollinators
Below are two practical remedies you can build in a weekend. The instructions are presented in a formal, informative manner to ensure correct application and successful results.
### Remedy 1: Night-Blooming Nectar Station
Materials:
– One shallow tray or wide saucer (ceramic or plastic)
– Sponge or folded cloth
– 1 liter (about 4 cups) water
– 100–150 ml (about 1/2 cup) high-quality molasses or dark sugar
– 2 teaspoons of brewer’s yeast (optional, for fermentation scent)
– A small platform or bricks to elevate the tray 15–30 cm off ground
– A nearby light source with red/amber LED (optional for observation)
Creation and Application Steps:
1. Prepare Base: Place the tray on the platform to keep it visible to moths and safe from ground predators. Elevation also reduces evaporation from heat sources.
2. Mix Nectar Solution: In a container, dissolve the molasses or dark sugar thoroughly in warm water. Allow it to cool to ambient temperature. If using brewer’s yeast to introduce fermentation cues, stir in after cooling.
3. Soak the Sponge: Place the sponge or folded cloth in the tray and pour the nectar solution over it until saturated. The sponge provides a safe feeding surface for moths to rest while drinking.
4. Position Near Flowers: Situate the station within 1–2 meters of night-blooming plants and away from heavy agitation (e.g., not under a frequently used pathway).
5. Maintain Cleanliness: Replace the soaked sponge every 3–5 days or sooner if heavily soiled. Clean the tray weekly with hot water (no soap) and refill to prevent mold and unwanted pests.
6. Observe Safely: Use a dim red or amber LED to check activity. Avoid bright white lights that deter moths and attract predators.
Notes on Application: This nectar station mimics the scent and texture of natural nectar sources and is particularly effective for larger moth pollinators that prefer to perch while feeding. Proper maintenance reduces disease risk and keeps non-target species like ants and flies from monopolizing the resource.
### Remedy 2: Native Host Plant Patch
Materials:
– A list of 4–6 native plant species known to host local moth caterpillars (consult local extension or native plant society)
– Mulch and compost
– Basic gardening tools: shovel, trowel, watering can/hose
– Protective cloche or mesh (optional, for young plants)
– Labels for plant identification
Creation and Application Steps:
1. Select Species: Identify native trees, shrubs, and herbaceous plants that are larval hosts. Prioritize a mix that flowers from spring through fall and includes night-blooming varieties (e.g., evening primrose, nicotiana, certain native phlox).
2. Site Preparation: Choose a partly sheltered location with appropriate sun exposure for your selected plants. Remove invasive weeds and amend soil with compost for healthy root establishment.
3. Planting Procedure: Install plants according to their spacing and depth requirements. Water thoroughly at planting and apply a 2–4 cm layer of mulch to retain moisture and suppress weeds.
4. Provide Structural Variety: Include some taller shrubs or small trees to offer resting and roosting sites. Moths use vertical structure and foliage for shelter and mating activity.
5. Avoid Pesticides: Do not apply broad-spectrum insecticides. If pest control is necessary, use targeted, low-toxicity methods and only after monitoring and identification.
6. Monitor And Record: Check plants for caterpillars, eggs, and signs of feeding. Maintain records to connect adult moth sightings with larval host plants over seasons.
Notes on Application: A native host plant patch not only supports moth lifecycle completion but also enhances local ecological resilience. Native plants typically require less maintenance once established and provide essential resources for a wider range of insects.
### Best Practices For Integrating Remedies Into Your Garden
– Space nectar stations and host plant patches so moths can easily move between feeding and egg-laying sites.
– Use water features sparingly and shallowly; add small stones for safe perching.
– Time remediation efforts: plant host species in fall or early spring for best establishment; set up nectar stations before peak moth activity (late spring through early fall in many regions).
### Citizen Science And Community Resources For Moth Identification
Joining local entomology groups or online platforms can accelerate learning. Upload your photos and notes to regional databases where experts can verify species IDs — and you’ll get better at moth identification faster. Community moth nights are fun: bring a sheet, a low-wattage light, and a thermos of something warm.
#### Safety And Conservation Considerations
Avoid attracting moths into traps or environments where predation or pesticide exposure is likely. When you provide supplementary food sources, maintain hygiene and monitor regularly to prevent disease spread among pollinators.
### Troubleshooting Identification Problems
If an insect doesn’t match photos in field guides, consider life stage (adult vs. worn wings), seasonal variation, and whether it’s a rare migratory visitor. When in doubt, photograph dorsal and ventral wing surfaces and the antennae, and submit images to a moth-focused forum.
There are plenty of moths waiting to be discovered in your backyard. With a bit of patient observation, targeted habitat improvements, and careful recording, your garden can become a small but meaningful refuge for these often-overlooked night pollinators — and you’ll become far more confident at moth identification in the process.


Leave a Reply